skip to main |
skip to sidebar
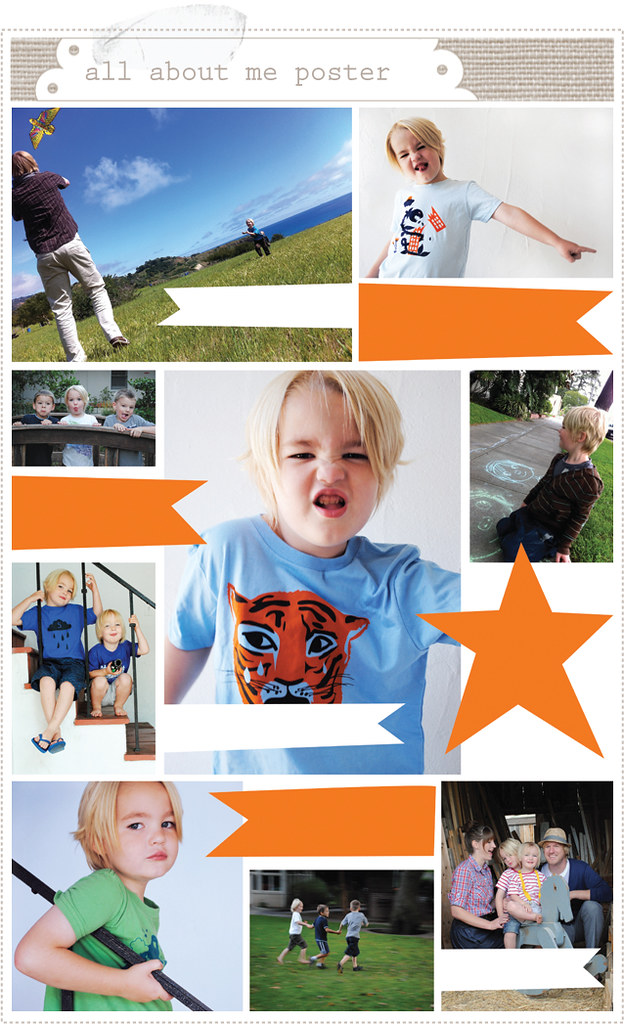
Little A is going to his first day of Kindergarten tomorrow and we had to pull together an "All About Me" poster for the event. Being up against a clock and having most of our stuff in boxes (I can't seem to find the boys art supplies anywhere and we are all going a tad crazy as a result!) I was worried about how "creative" we could be. So I decided to come up with a simple design that was full of photos and spaces where Little A could write in his likes, etc. I was lucky enough to find our 13x19 glossy photo paper (which also happened to perfectly fit the poster we were given for the task). From there I printed out the images (that Little A helped to pick out) and then had Little A write in his interests.
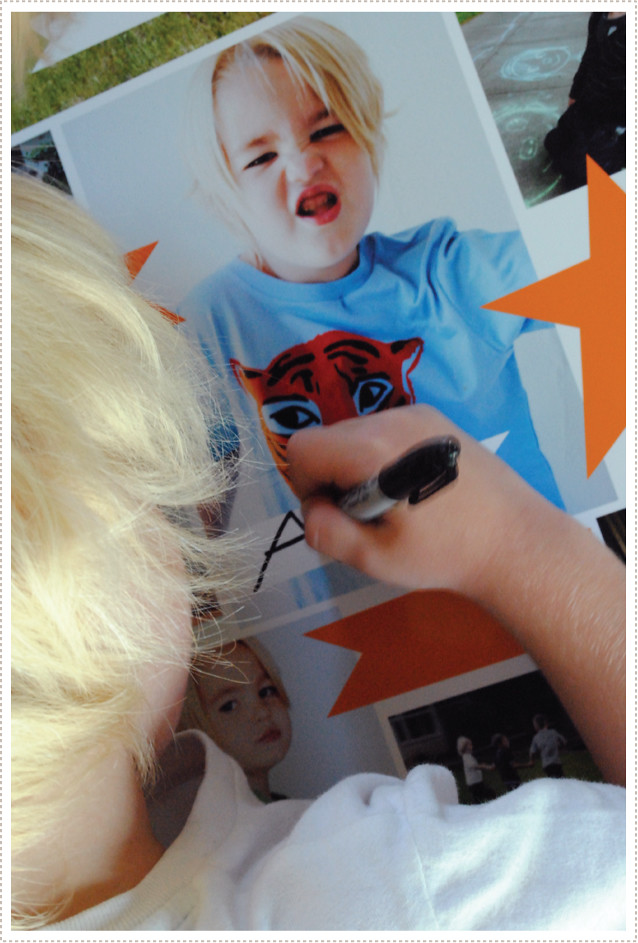
Little A took to it immediately and began filling it out (it didn't hurt that I let him use a permanent marker, his favorite taboo writing utensil of choice).
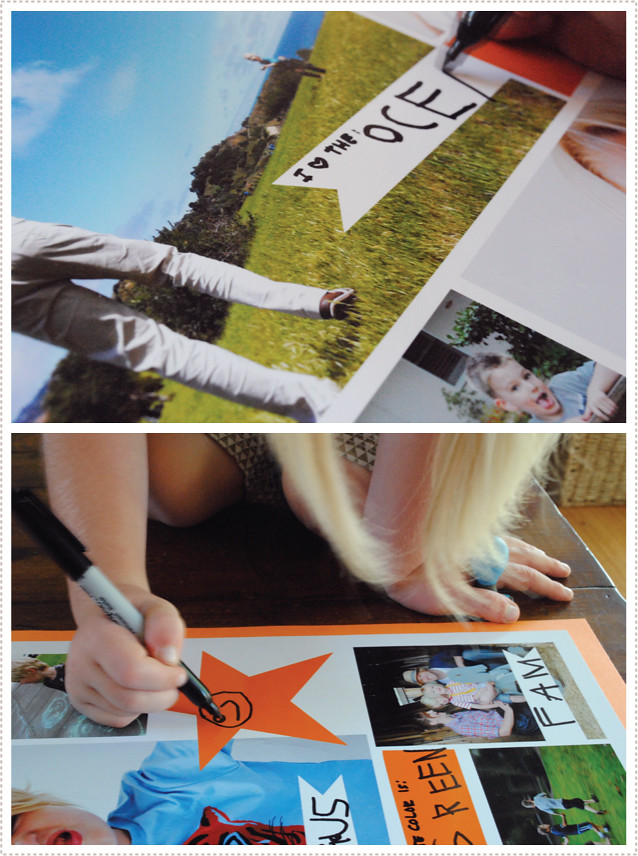
He then chose to draw a self portrait on the star and I loved how it turn out.
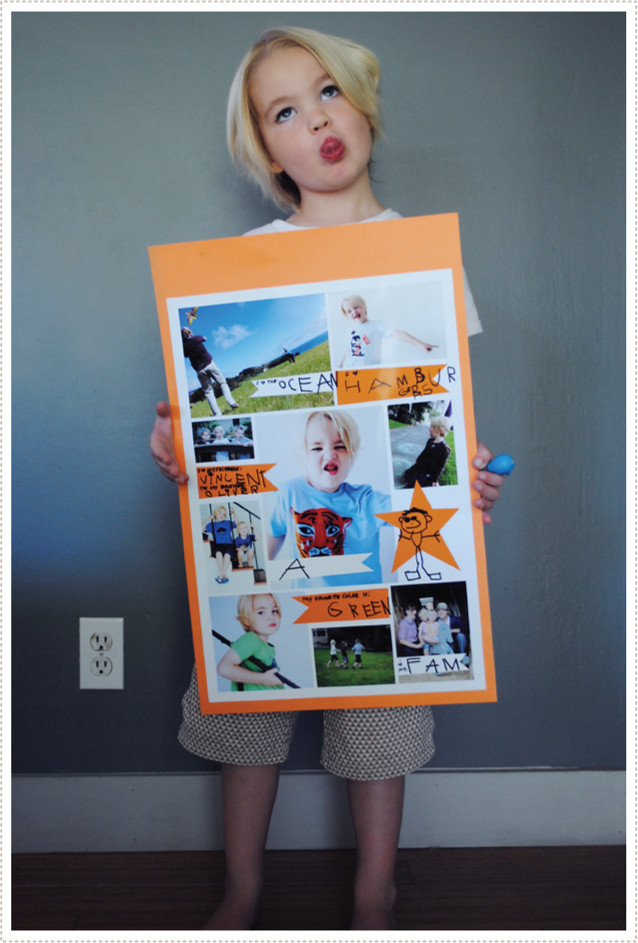
I loved how proud he was of the poster and he insisted on bringing it to Back-to-School night. And me? Well I was wiping my brow with a sigh of relief, glad that I didn't let my "I'm not so great with changes" little guy down in the midst of all these transitions.
Here's hoping the first day of school goes so well!

And in case you are interested, I'm giving you a template (designed in Photoshop) for you to use as well. As I mentioned earlier, It's a nice large size of 13x19 but if can be scaled down if need be for a smaller paper or for scrapbooking, etc. And if you do want to use the larger size, and don't have a large format printer, you can just take your design, via cd or thumb drive, etc., to your local copy center, such as Kinkos, and have it printed out there for you. It fits perfectly on an 14x22 poster board. Just add a title up top and you are good to go.
Download the template here and enjoy!
*sorry, for some reason blogger won't read the link but if you copy and paste the following link into a new window, you should be able to download it. Link here: files.me.com/merrileel/1m0t3l
As we've been unpacking and trying to get settled in to our new place I've been having a few nostalgic pangs while remembering our previous place of residence. Mostly because it was already in order (there are few things in life more stressful than moving!) and in the two short years we lived there, many memories were made (little O pretty much spent his entire life here and little A's preschool years were all in this home). Even though it was short lived, it was a special place for us, and one that we will always hold dear.
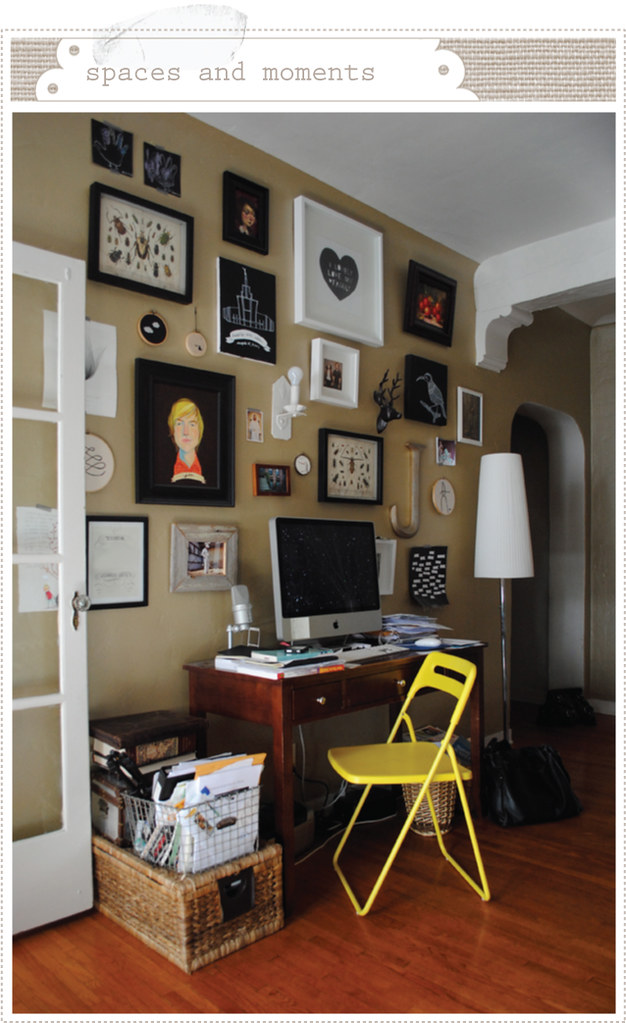
On that note, I thought I'd share with you some of my favorite spaces and moments from our South Pas. home. The first pic is of Jon's desk where he would work, and his wall - which grew into a wall of family photos, painted portraits, momentos and more.
Below is the same room opposite Jon's desk which was our "all purpose room". Seriously. Both Jon and I would work in here (so it was a home office), our kids would play and watch movies in here, and I had my sewing machine and all my craft/fabric storage in this room. Yeah it was a little crazy but luckily the room was large enough that it was able to comfortably accommodate all of these needs. This is where we spent most of our time and definitely the room I miss the most.
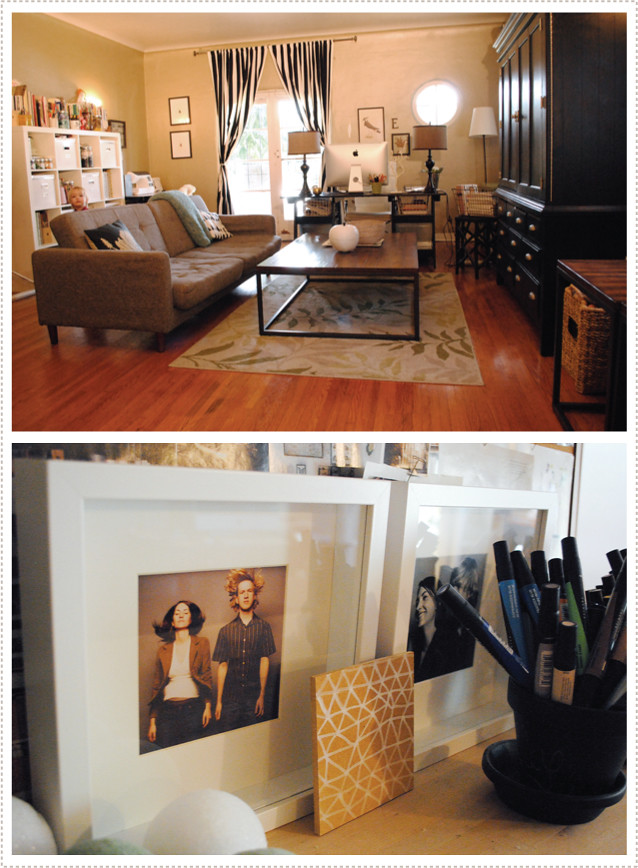
I finally managed to frame some of our photos that a friend (Chris Lindsay) took of Jon and I back when we lived in Brooklyn, NY. They served as a fun reminder of our newlywed years in NY.
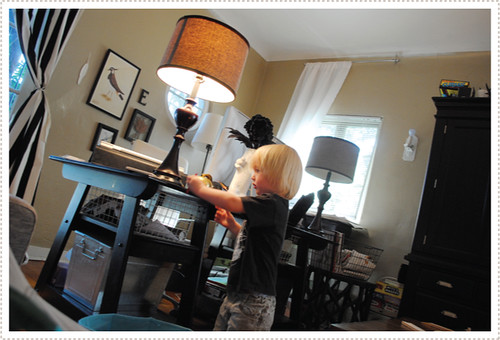
I love this moment. Little O is at my desk, concentrating seriously on his imaginative play - something that was a very common occurrence.
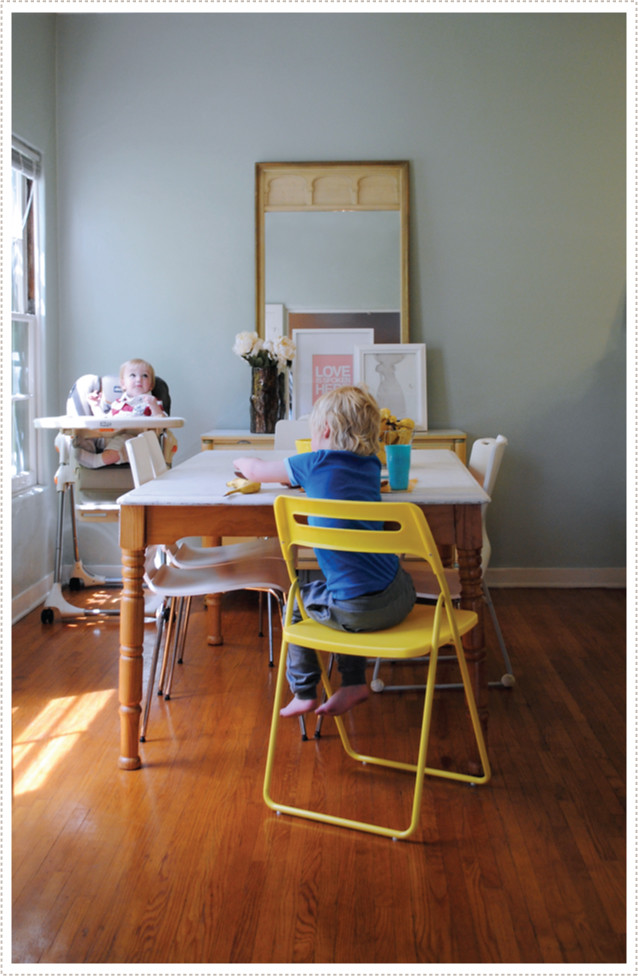
This next room was our dining room which, when not littered by cherrios, was also a pretty great place to congregate. I really love the above pic (take after we had recently moved in and Little O was still in a high chair) as it shows the light in this room as I loved it the most.

I loved the little moments in the home that reminded us of the ocean and the beauty that could be found around us.

I also really loved this Asian inspired with-a-nod-to-vintage-Hollywood-glamor dresser that I found at a thrift store upon first arriving in California. We ended up using it as a hutch in the dining room to store extra linens and educational activities for the boys to entertain themselves with while at the dining room table. We unfortunately couldn't fit this lovely item on our moving truck so it was put on the street (along with the kitchen table and several other items!) with a FREE poster in front (time had run out to sell anything). It, and everything else, was snatched up pretty quick.

The above and below a pics are a few shots of our small yet functional kitchen.
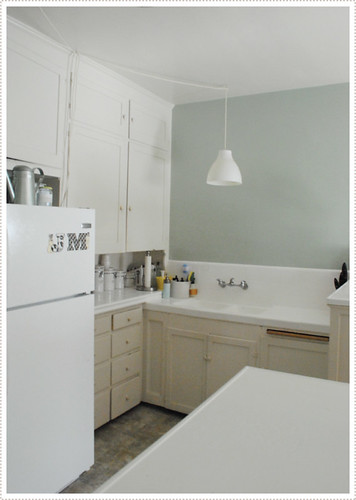
I'm more of a "tuck the kitchen away instead of having it be the center of the house" kind of girl so this worked for me. Jon, the master chef in the house, would definitely have liked more room to explore his culinary talents. Thankfully, our new place has just that.
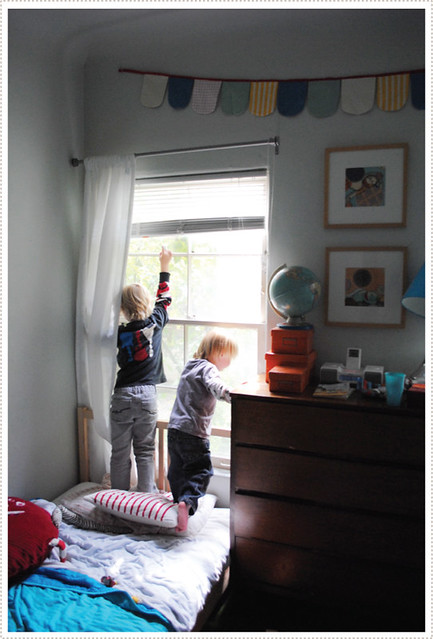
I really love the above pic of the boys in their room (also another favorite place of mine). Back when Little O would take naps, I loved laying down with him for a few minutes. Everything was so calm and serene and the world outside seemed to melt away. To me, it was a room to dream in. I think the boys liked it as well and I hope Little A can remember at least a few special moments from this room to take with him as he grows. (As I go back in my childhood memory, I find that 5 yrs is the age that my memory really starts to become solid and more clear. I cherish these memories and hope that Little A will as well. And who knows, perhaps Little O might have a few sense memories as well).
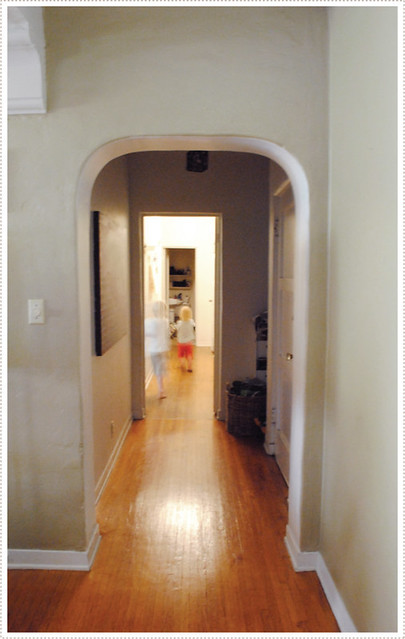
And finally I love this last pic only because it show my two littles as if they are merely apparitions running through the halls. Little happy ghosts that will hopefully have left their giggles and childhood optimism within these walls.
So yes, we will miss our old home but are excited about having a backyard (I can count at least 5 messy mud fights the boys have already indulged in) and the mid-century modern vibe of our new home.
And I just have to say a little something about the wonderful people I was able to associate with while living in South Pas. You really don't know how good you've got it until you move. Whether it was old Brooklyn friends who invite you to their private beach for one last bash, complete with home made crepes in the morning. Or South Pas friends who offer to watch your kids while packing and loading the moving truck (and then when half of your stuff doesn't fit so you have to take another day unpacking and repacking the truck and giving away a number of large items, they offer to watch your kids again). Or whether they send you away on your journey with a road trip care-package full of sunflower seeds, beef jerkey, sour gummy worms and more items sure to keep you senses awake and alert, or kind cards with kids games and activities for the road, or Great Harvest pancake mix and locally made raspberry syrup (yum!), or Williams Sonoma's fabulous Pina Colada mix to toast to you new place, or mouth watering home made granola...You know you are loved and had it good. Thanks you guys. You know who you are and have made it so a return trip to our old stomping grounds just can't come fast enough.
And now on to life in the present. There are still so many boxes to unpack and a back-to-fall wardrobe we have yet to share with you. Little A starts Kindergarten tomorrow so we are full steam ahead here. I'll be sure to try and check in here as much as I can so stay tuned.

These past few weeks have been a crazy whirlwind of moving, getting Little A ready to start Kindergarten (sigh..) and working on a number of illustration jobs. To keep me up at night and plowing forward, I consumed a marathon's worth of HGTV Design Star, Dear Genevieve and finally managed to get caught up with Secrets From a Stylist (loving that Emily Henderson. Does she not have the coolest style or what? Not just in design but I totally want her wardrobe, right?). So after being inundated with tips and tricks for the home, I couldn't help but take a little time out to do my own little home decoarating. And what better way to add a little pop in your home than a throw pillow? And one with a touch of gold, ikat and a nod to the sea? Even better.
I'm sure by now most of you are experienced in the art of freezer paper stenciling (or are at least familiar with the technique) but I went ahead and showed you how I went about creating this hand painted motif in a step-by-step fashion.
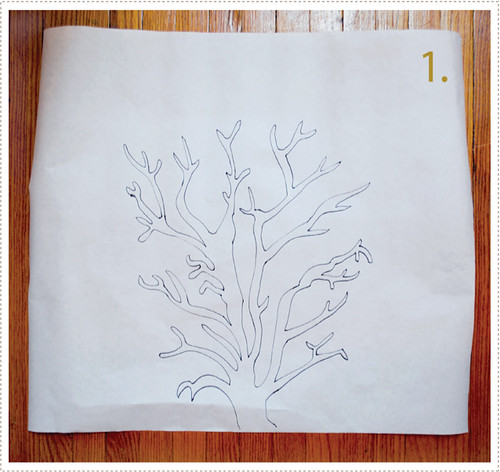
1. First decide what size and shape of throw pillow you want (I found a good guide for this here). For mine I used a down pillow form from a old throw pillow that I already owned and wanted to update. I then cut out a sheet of freezer paper that that was roughly the size of the pillow case. From there I drew the design I wanted right onto the freezer paper.
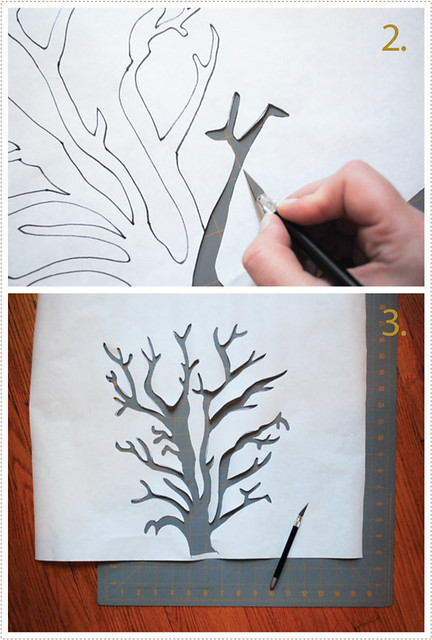
2-3. After the drawing was complete I began cutting. To do this, place the freezer paper over a self-healing mat and then use an x-acto knife to cut out the design. Intricate designs like this take a little bit more time but are worth the pay off in the end, so hang in there :).
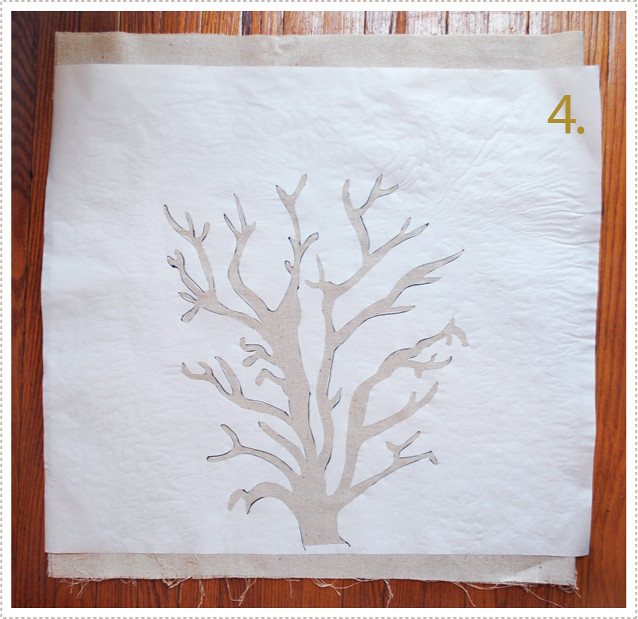
4. After cutting, iron the paper (shining side down) onto your choice of fabric. For mine, I chose a linen for the front and a bright silk Ikat pattern (purchased from eBay) for the back. (For pillow sizing/sewing techniques and instructions, I always refer back to this Design Sponge tutorial).
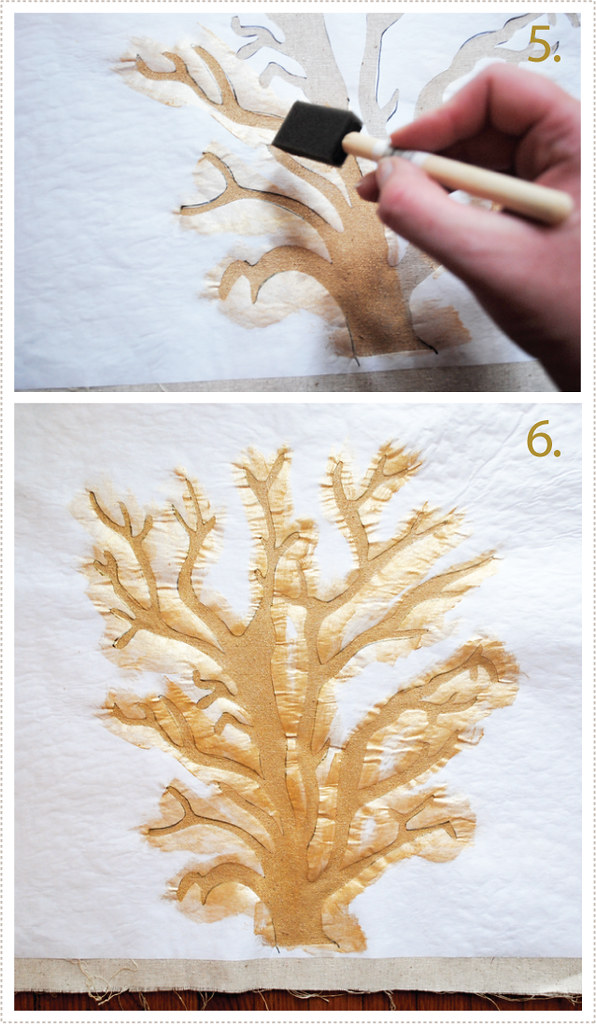
5. Once the freezer paper is securely ironed onto the fabric, you can begin painting (be sure to place a card board box or something similar underneath so that the paint doesn't bleed through to the surface below). I was really feeling gold for this so I chose a metallic gold fabric paint. I like sponge brushes for this as they really help to get smooth and precise coverage.
6. Once you have painted all of the necessary areas, set it aside and let it dry. Some recommend letting it dry over night before taking the stencil off. I did that with my first freezer paper stencil but have since found that I can get just a good results if I let it sit and completely dry before taking the stencil off. Could be an hour or more (or less) depending on the size of stencil and amount of paint used.
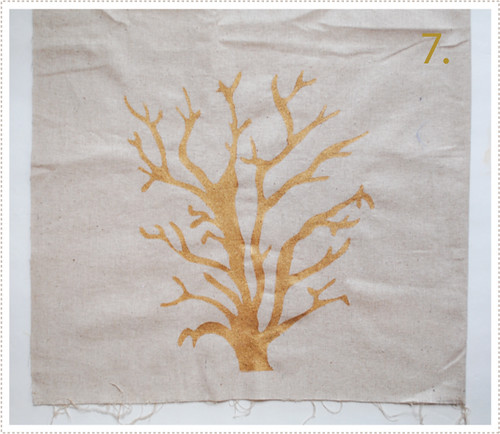
7. Once the paint is completely dry, carefully remove the stencil. This is such a fun part, as you finally get to see the finished painted design in all it's glory. Sit back an enjoy it.
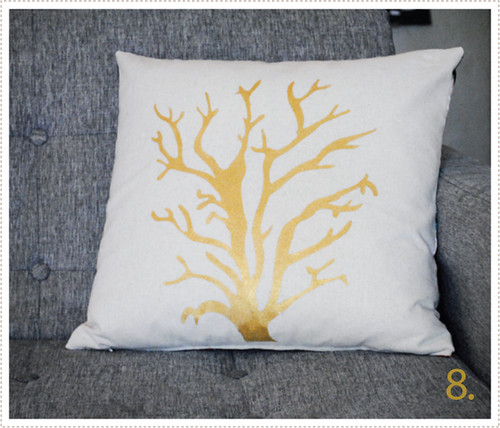
8. Then complete your pillow by sewing together your newly custom painted fabric with your choice of back side fabric. (Again, I used this zippered throw pillow tutorial to do this).
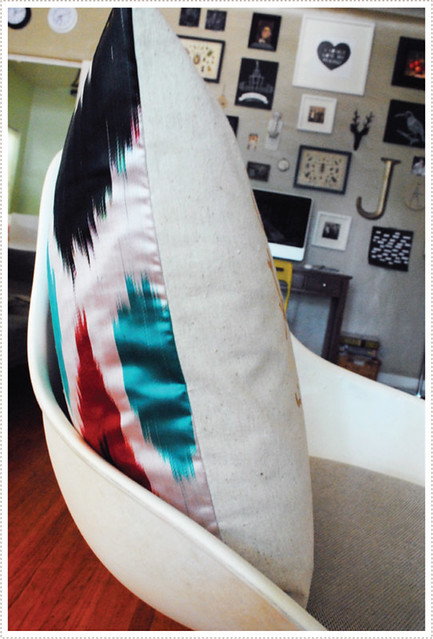
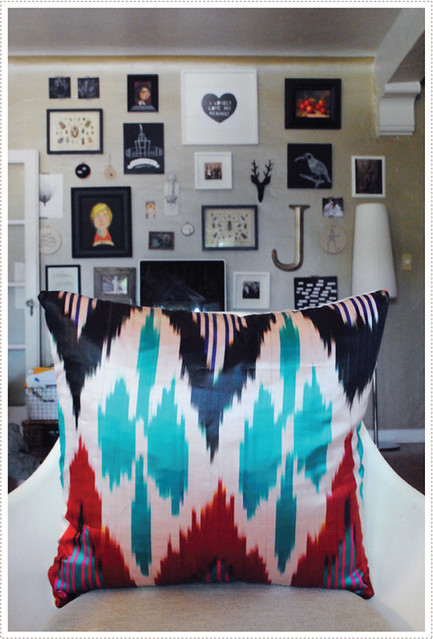
When it's all complete, toss it on the couch and sit back and enjoy your new creation!
And...if you are interested in doing a coral-motif like mine here, I've offered up a stencil for you to download by clicking here. It's created on 8.5x11 paper for you to print out but if you want to increase the size you can take it to your local copy center and have it enlarged there.
Enjoy!
(Oh and if you make a pillow, tote bag, shirt, etc. using this motif, I'd love to see how it turns out so shoot me an email. Thanks!)
(Oh and today is Jon and I's 10th anniversary! can you even believe it? Happy Anniversary Jon!!)
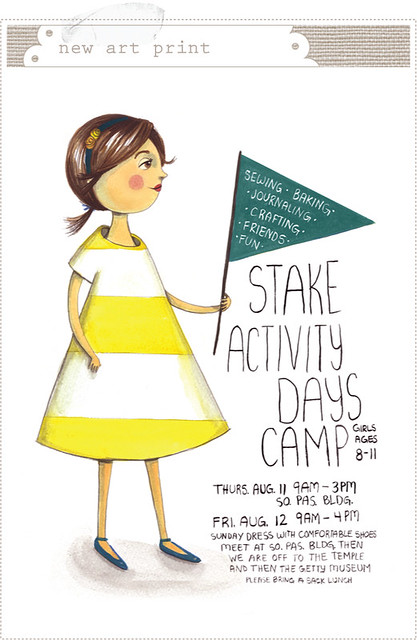
So I've been a busy, busy bee this past month. In between a number of illustration projects, preparing for a move and trying to keep my littles entertained in the California heat, I've managed to squeeze in a 2-day, day camp that I just happened to be in charge of planning and carrying out. The camp was for girls ages 8-11 and I couldn't have asked for a more ideal age range or group of girls. This age is the most common demographic for which I do much of my illustration work for and I love it. These girls are not jaded, are full of life, ready and excited for the future, are amazingly resilient and willing to see the good and beauty in everyone and everything. In short, I love these girls and had a fantastic last couple of days.
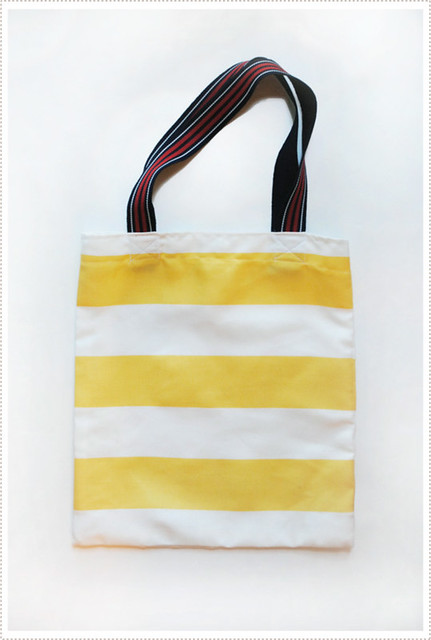
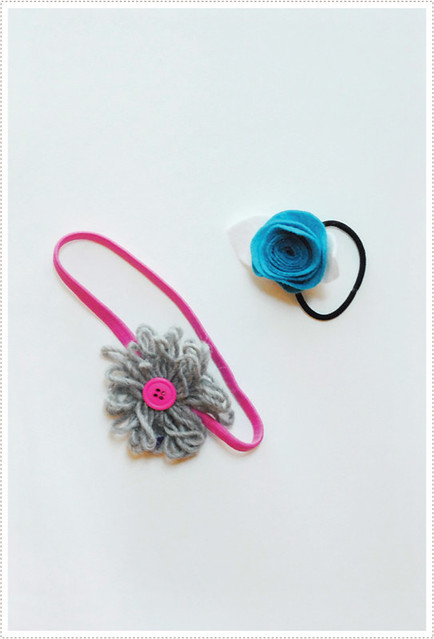
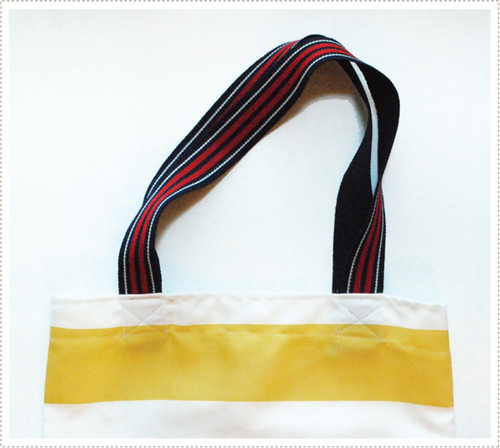
It was such a treat to see how each girl would light up when seeing her creation come to life and to realize just what she was capable of. I also really loved seeing a sea of flower adorned heads bobbing up and down throughout the camp and most every girl proudly brought along their newly sewn tote bag to the field trip on the second day. All in all it was a great success!
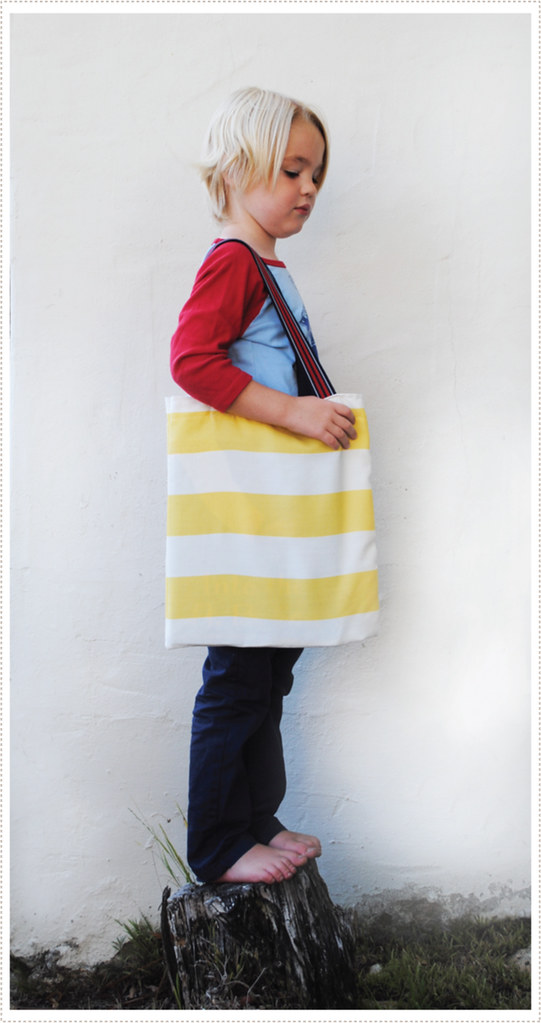
Now that the camp is over, we have loved having the tote bag around here as well. It makes the perfect library bag for little A.
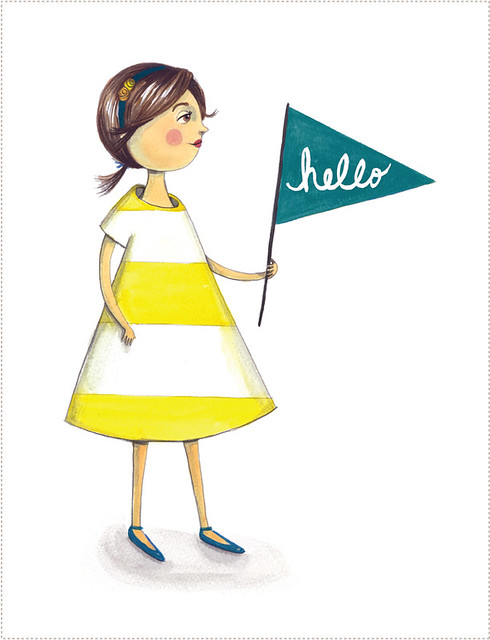
 On our bag we varied a bit from the Purl tutorial and used an old elastic belt for the handles (which worked great!) and then I added the stitched "x" marks where the handles are attached. I was also fond of the illustration that I created for the camp flyer and thought I'd offer a print variation of it for you in the shop! Enjoy!
We celebrated Jon's birthday on Wednesday and I can't believe how time flies. Wasn't it just yesterday that we were celebrating with donuts and custom cards. Well we had a great day starting with breakfast at Marston's and ending with a Menchies custom frozen yogurt pie.
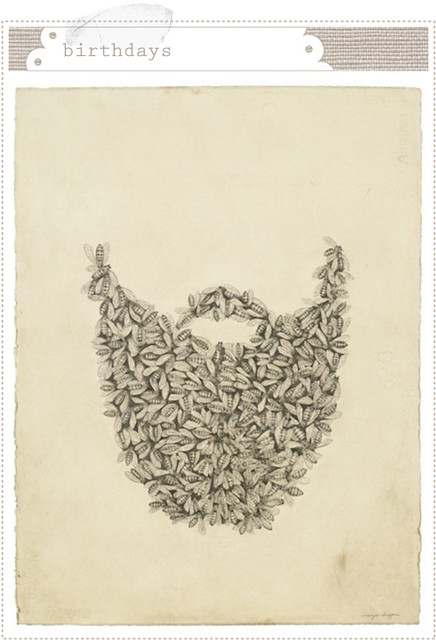
In celebration of Jon I wanted to share a gift I gave him, a Beard of Bee print by artist Meagan Donegan, in honor of a recent commercial he was in. (I actually gave this to him for Fathers Day but I thought this a good occasion to share). Go ahead and watch the commercial and you'll see how it all connects. Oh and Jon's the goofy one in the white bee keepers suit.
Fun huh? You should check out the entire campaign as it's pretty funny. And I'm not a big chicken girl but I do sort of crave their chicken (even if I've never had it) so job well done.
And and because I know you are curious:
- yes those are real bees
- yes the actor with the bee beard was stung - about three times around the eyes
- yes the actor with the bee beard was an experienced animal handler but this was his first time working with bees
- yes we're assuming he was well paid for it :)
- yes Jon was initially more nervous about the bees than his co-actor
- yes you can see this campaign on TV...if you live in the South, where the Bojangles Chicken chain resides
- yes Jon is really that funny in real life, only a little less surfer dudesque
- yes Jon is a fabulous actor and...
- yes he is available for hire! :)
Happy Birthday Jon!
|